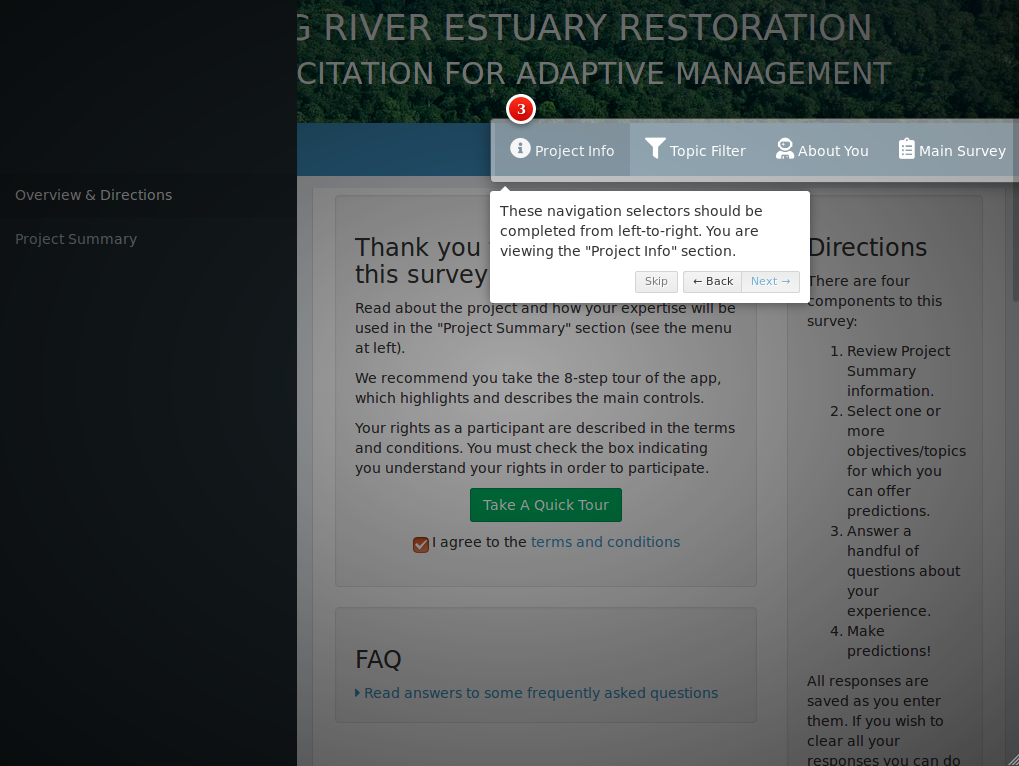
I am working on an application that has four tabs, and I expect users to complete them sequentially. I point this out in written instructions in several places, and I could number the tabs, but it would be nice to take users on a tour of the controls so they don’t have to read a bunch of words and think about them. Intro.js is a nifty little add-on that will do exactly this.

Using Intro.js is simple. Download the js and css files and place them in your app’s www directory; the js file goes into the js directory, and the css file into the css directory:
myapp
|--data
|--server
|--ui
|--www
|     |--img
|     |--js
|     |    |--intro.js
|     |    +--messageHandlers.js
|     |
|     +--css
|          |--introjs.css
|          +--custom.css
|--server.R
+--ui.R
Once that is done you need to add the intro attributes to any element you want to highlight. At a minimum you add data-intro and data-step, which contain the text to display and the step number:
actionButton(
    inputId='starthelp',
    label='Show Help',
    `data-intro`='Use your arrow keys or the buttons to move to the next step, and press Esc or click anywhere to close the help screen.',
    `data-step`='1',
    onclick='introJs().start();'
)
This is pretty easy, but there are two complicating scenarios:
- When an app has multiple tabs, the tabs are all contained on the same page. Help on hidden tabs still is shown by default.
- Some elements are created automatically (e.g. navbar and sidebar buttons) and attributes can’t be added to them directly.
Case 1. Working with multiple tabs
There are several ways to handle this:
- All content on each tab can be placed in a single unique container, then the container is passed to
introJs(). - Each element can be assigned a common group using the
data-intro-groupattribute, and the group can be passed to thestart()method. - There can be multiple help buttons, and each could start at a specific step number by passing the step to the
goToStep()orgoToStepNumber()methods, as inintroJs().goToStep(2).start();which starts with step 2.
I prefer the second method because the entire screen grays-out rather than just the single element (as happens when option 1 is used), and because the tour ends when it completes all elements in the group (unlike option 3).
Case 2. Auto-generated elements
Sometimes it is useful to add a help step in a navbar or a sidebar. I’m using the shinydashboard package, and I want to point out to users that the sidebar can be collapsed, and that the sidebar items are dynamic and may change depending on which tab is selected. To do that, I use a multistep process:
- Write a js or jQuery function to add attributes to an existing element
- Use the server to determine when the desired element is loaded
- Use the server to trigger the js or jQuery function once
1. The jQuery function
Because I want to call the js or jQuery function from the server, I wrap it as a customMessageHandler:
Shiny.addCustomMessageHandler("sidebarhelper",
  function(message) {
    var el = $(message.el);
    $(el).attr("data-intro", message.intro);
    $(el).attr("data-step", message.step);
    $(el).attr("data-intro-group", message.group);
    $(el).attr("data-position", message.position);
  }
);
This will accept either an id or a class as the element, which should be great.
2. Determine when the element is loaded
For renderUI() elements it is only useful to trigger the jQuery when the proper ui is loaded. I’ll know it is loaded when the input elements get a value other than NULL. Rather than use the visible input elements I add a hidden checkbox that users won’t interact with, and therefore won’t invalidate during use. To my rendered UI I add something such as:
div(
    radioButtons(inputId='somebuttons', 'Select the best number', choices=setNames(nm=c(1:10))),
    div(style='display:none;', checkboxInput('dashloaded', NULL))
)
and in my server I create an observer:
observe({
    if(length(input$dashloaded)) {
        session$sendCustomMessage('sidebarhelper', list(el='#sidebarmenu', intro='The menu items on each page are different. When you see the menu, or the collapse/expand button, be sure to check the menu options.', step='7', group='overview', position='right'))
        session$sendCustomMessage('sidebarhelper', list(el='.navbar-custom-menu', intro='These navigation selectors should be completed from left-to-right. You are viewing the "Project Info" section.', step='3', group='overview', position='auto'))
        session$sendCustomMessage('sidebarhelper', list(el='.sidebar-toggle', intro='Collapse the menu bar to free up screen space.', step='8', group='overview', position='auto'))
        cat('showing nav\n')
    }
})
The first call adds introjs attributes to the sidebar, the second adds them to the navbar, and the third adds them to the sidebar toggle button.